We have recently released a new feature that will allow you to make sure your bookings are progressing with all the information that is required and will give you the peace of mind that you aren’t double booking your artists or breaking any radius clauses.
This new feature is called Checklists and I’m going to show you how to set them up in this blog post.
Firstly, you will need to head over to your settings to setup your first checklist.
Click on the settings icon in the top menu and in the sidebar find the ‘Checklists’ option. Click on ‘Add new checklist’ to create your first list.
You are presented with a whole series of options that you can activate as required.
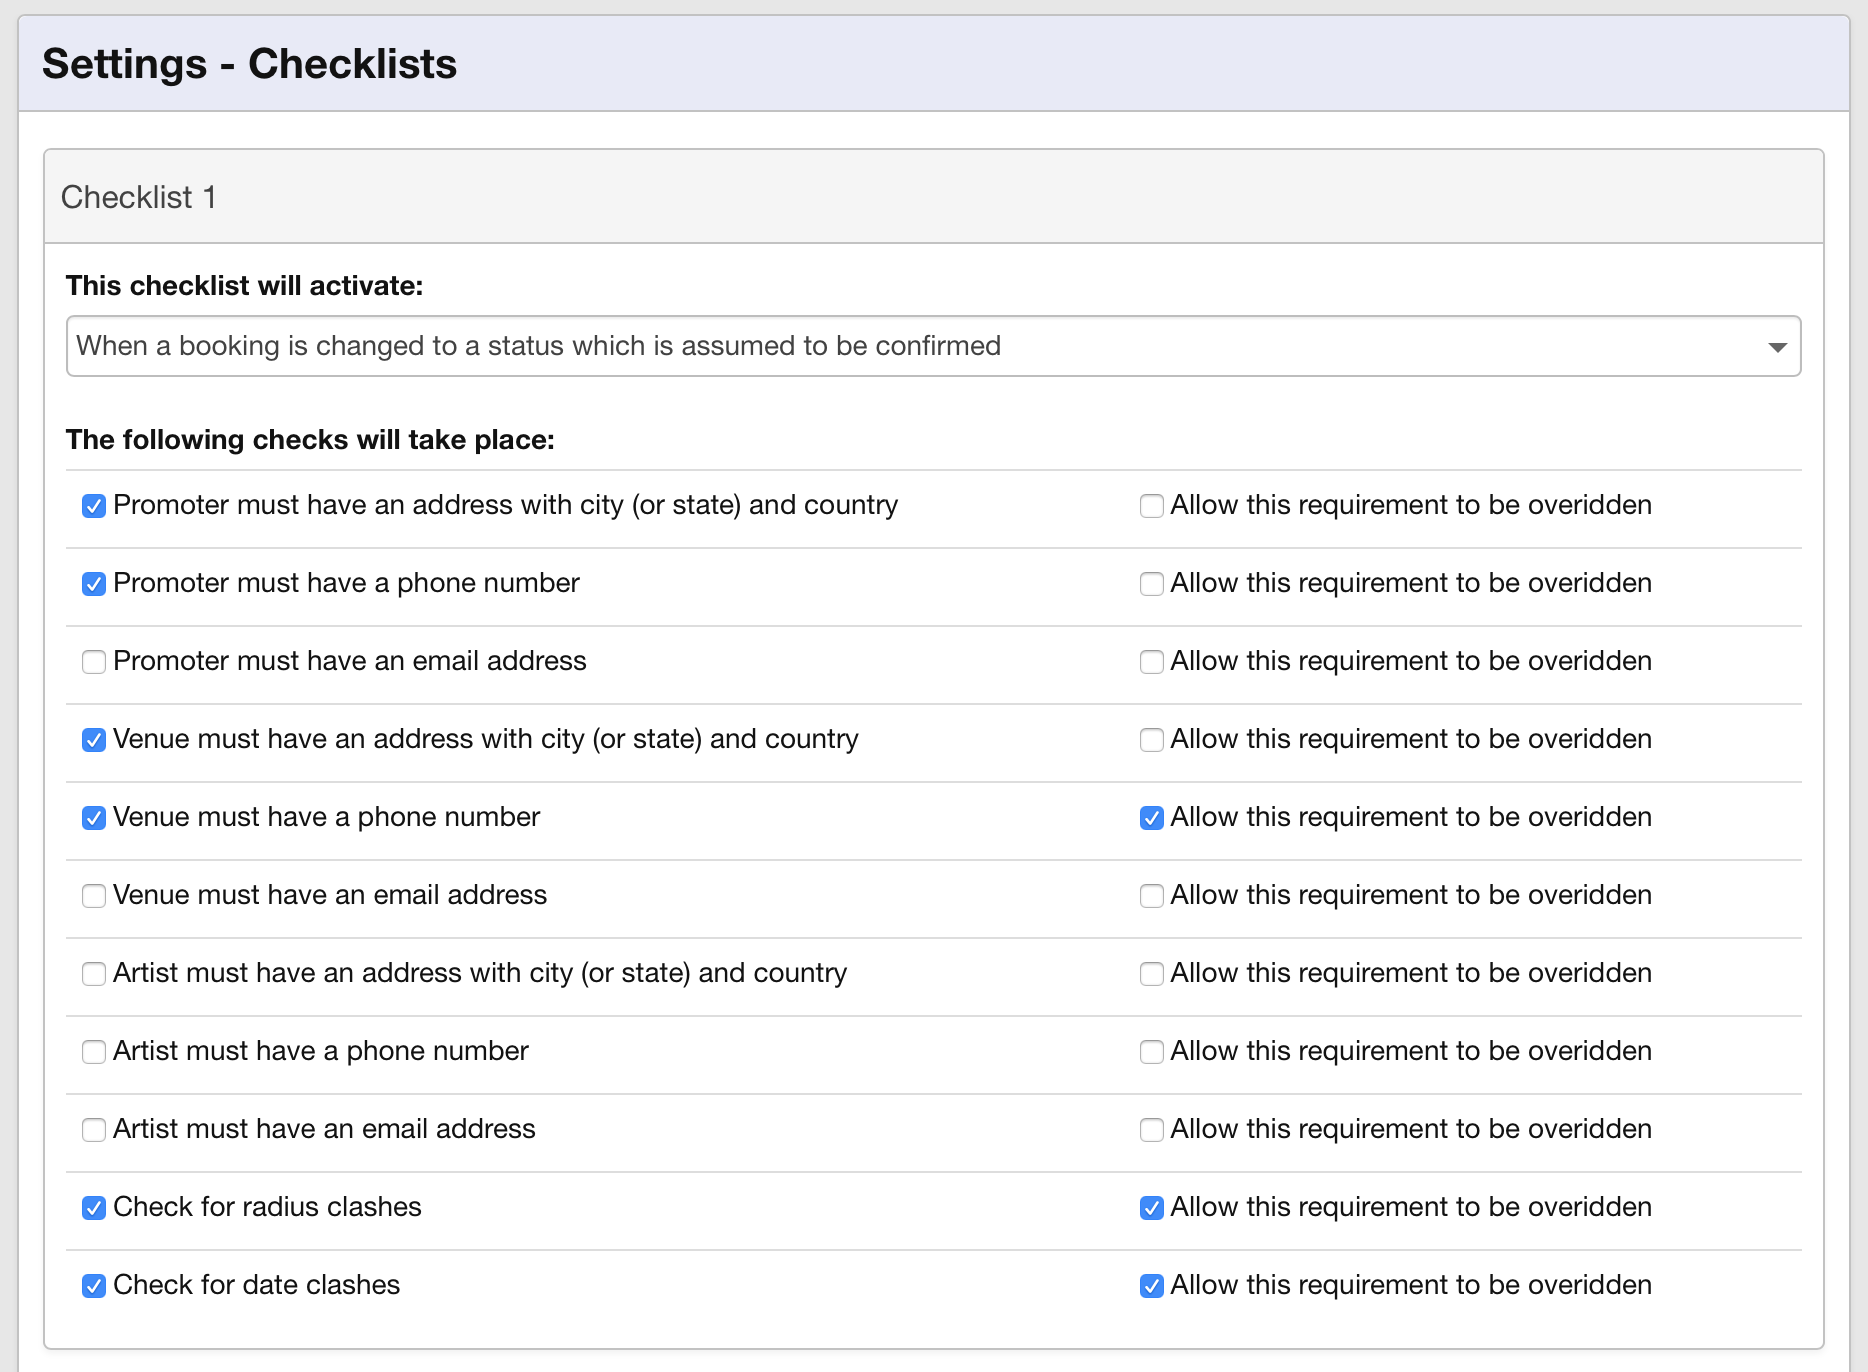
The first of which being the trigger that generates the checklist. From the dropdown you can select from four options.
- When a contract is created
- When an invoice is created
- When an itinerary is created
- When the booking is changed to a confirmed status
I’m going to select when the booking is changed to a confirmed status. This is quite a nice way to use the checklist as it makes sure that when the booking is confirmed Overture is going to double check that the data you have requested as required is present and that there aren’t any clashes.
Next from the list of options I’m going to select a few. In this example I want to make sure that the artist doesn’t have any bookings that clash with this one and also that it doesn’t infringe on any radius clauses I have setup. But I also want to make sure that the promoter has all the information I require and that all the necessary venue information is present.

For a couple of these options I’m also going to allow the agent in charge of adding the booking to override, so that Overture will make them aware of the problem but give them the choice to progress anyway.
Finally, I need to make sure to save the checklist by clicking the save option at the bottom of the page.
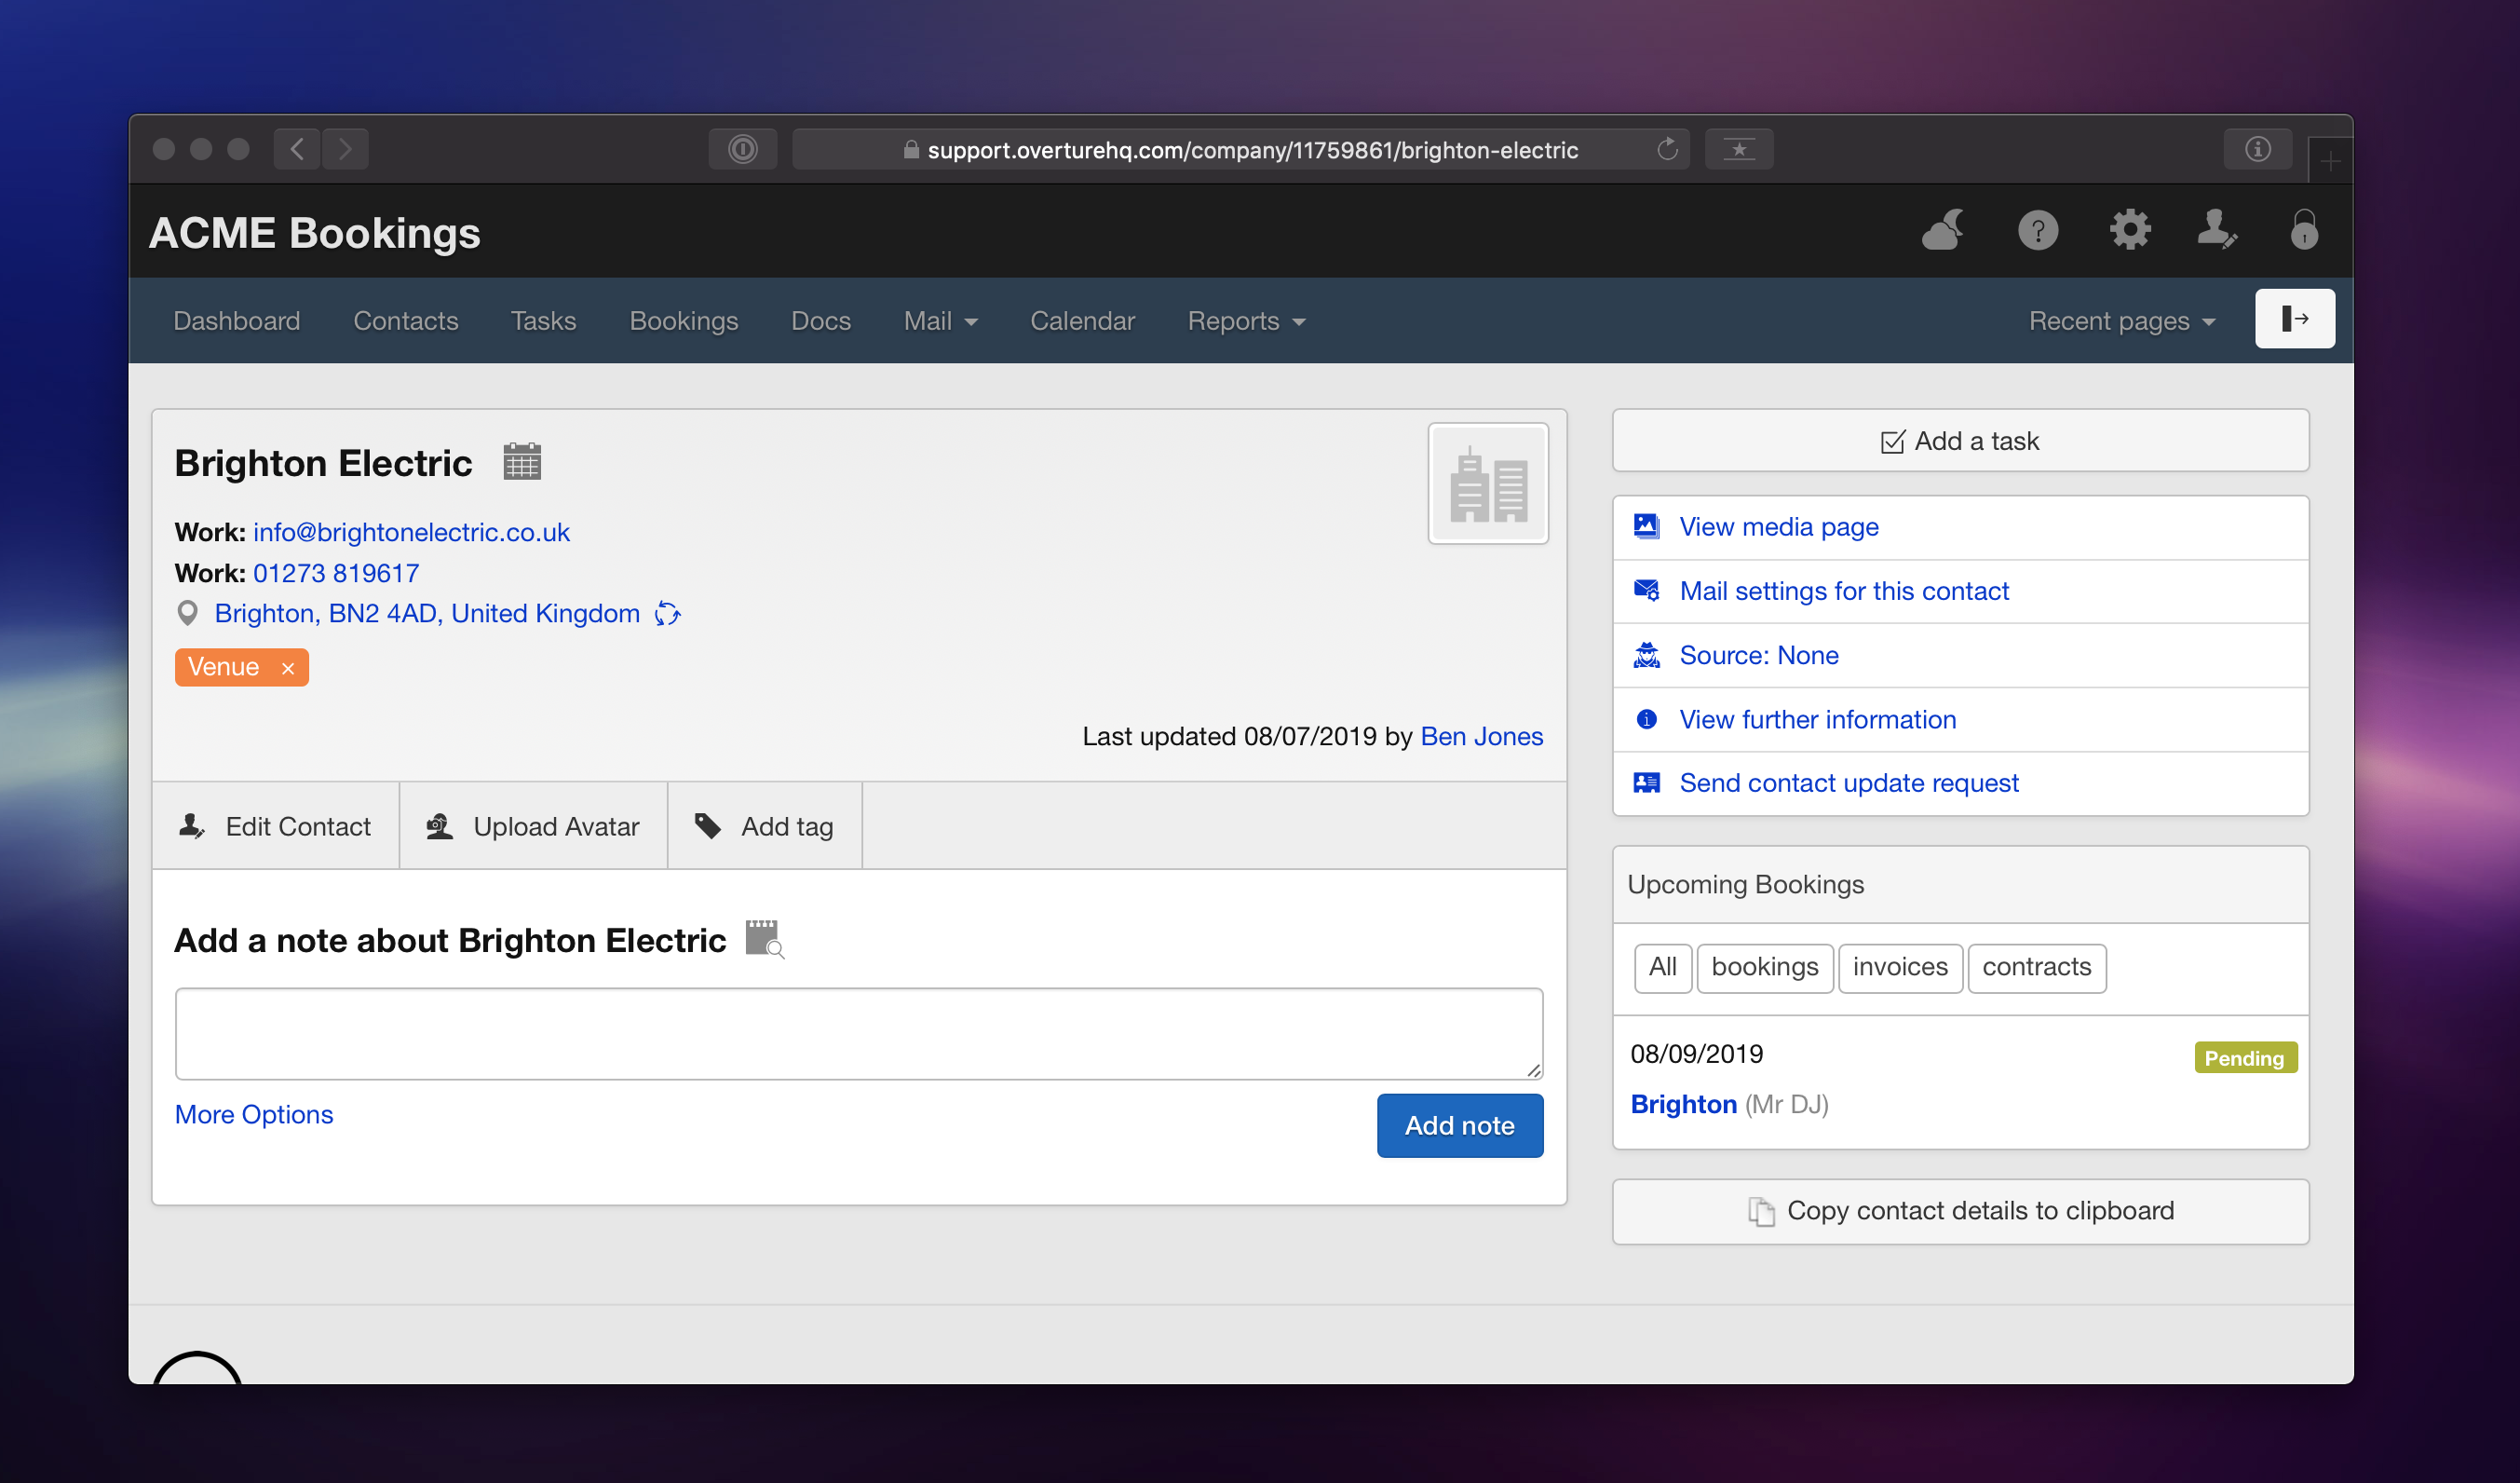
If I now head over to a booking that is incomplete so I can demo how the checklist will work.

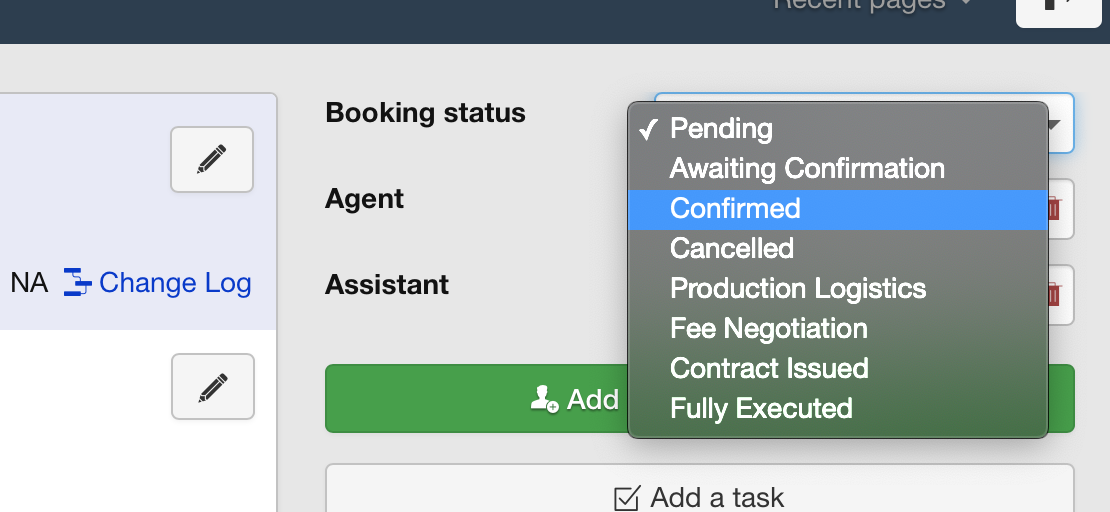
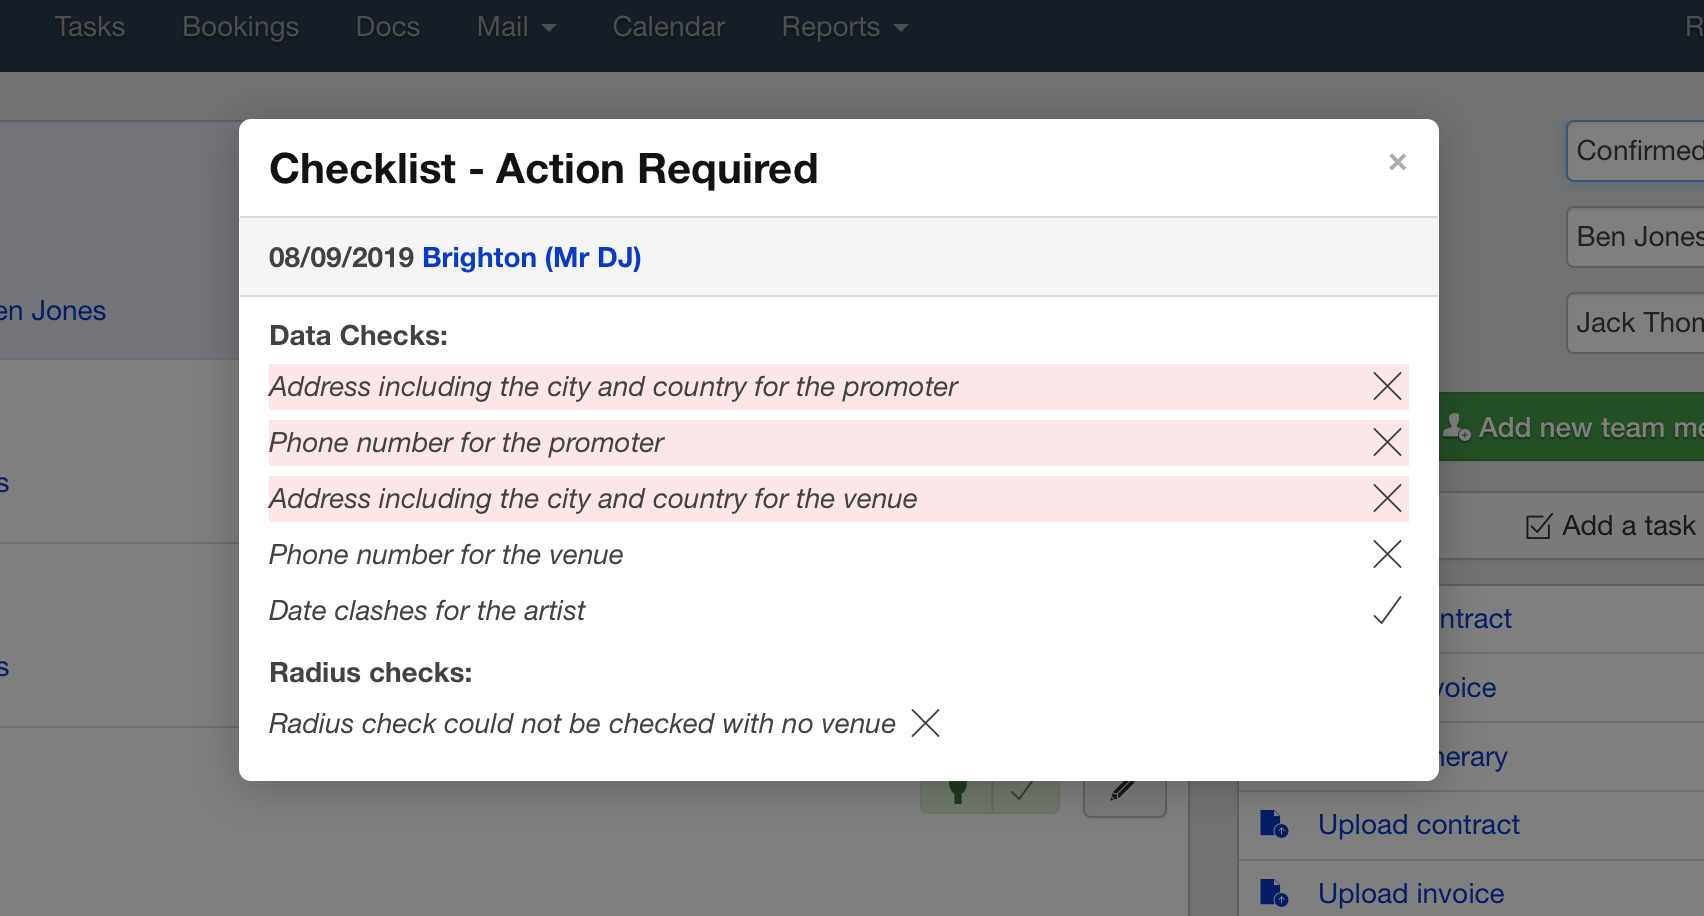
When I attempt to select a confirmed status Overture instead shows me the checklist popup containing any issues that it has found. In this example I have a whole lot of data missing so there is a lot to fix.
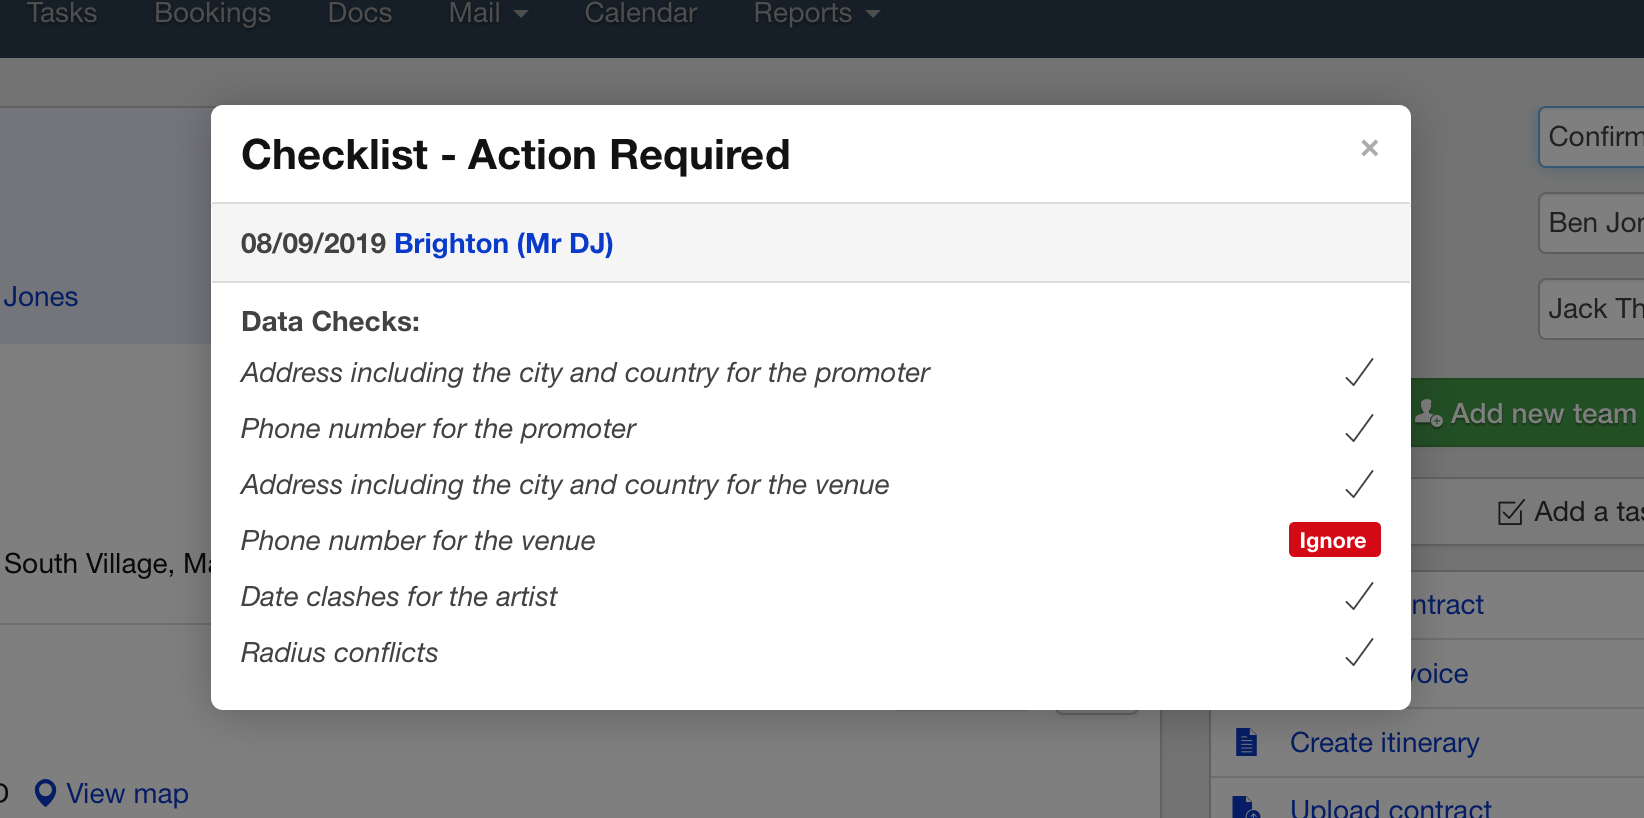
If I fill out all the information that is requested and try again, in this example Overture is still not happy since the venue doesn’t have a country.
If I fix that problem and then try again, I can also see that the venue doesn’t have a phone number but this time Overture has allowed me to ignore as per the settings chosen.
If I ignore this warning Overture will remember the agent that submitted the request for future reference.
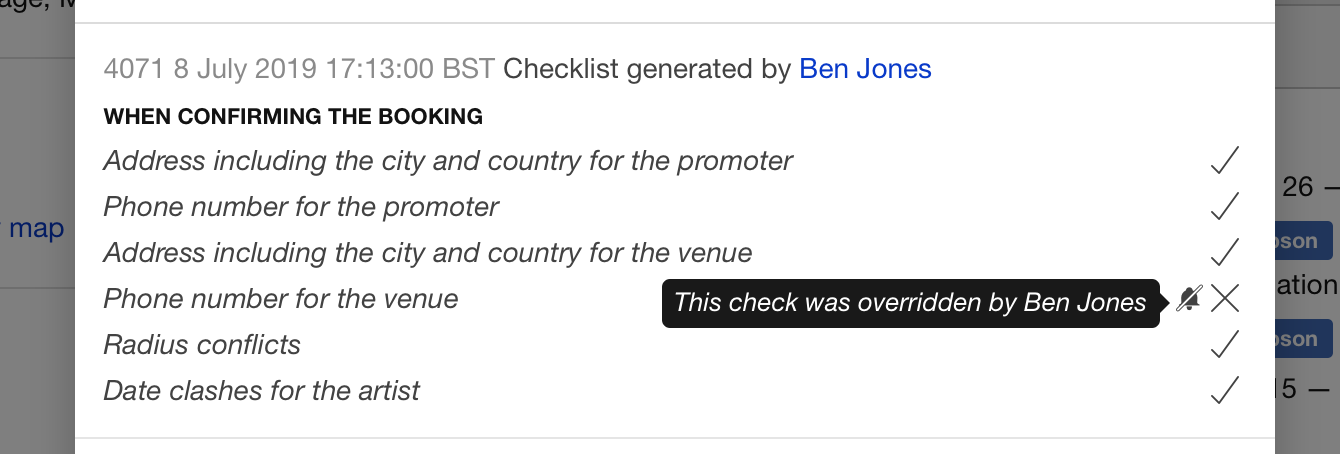
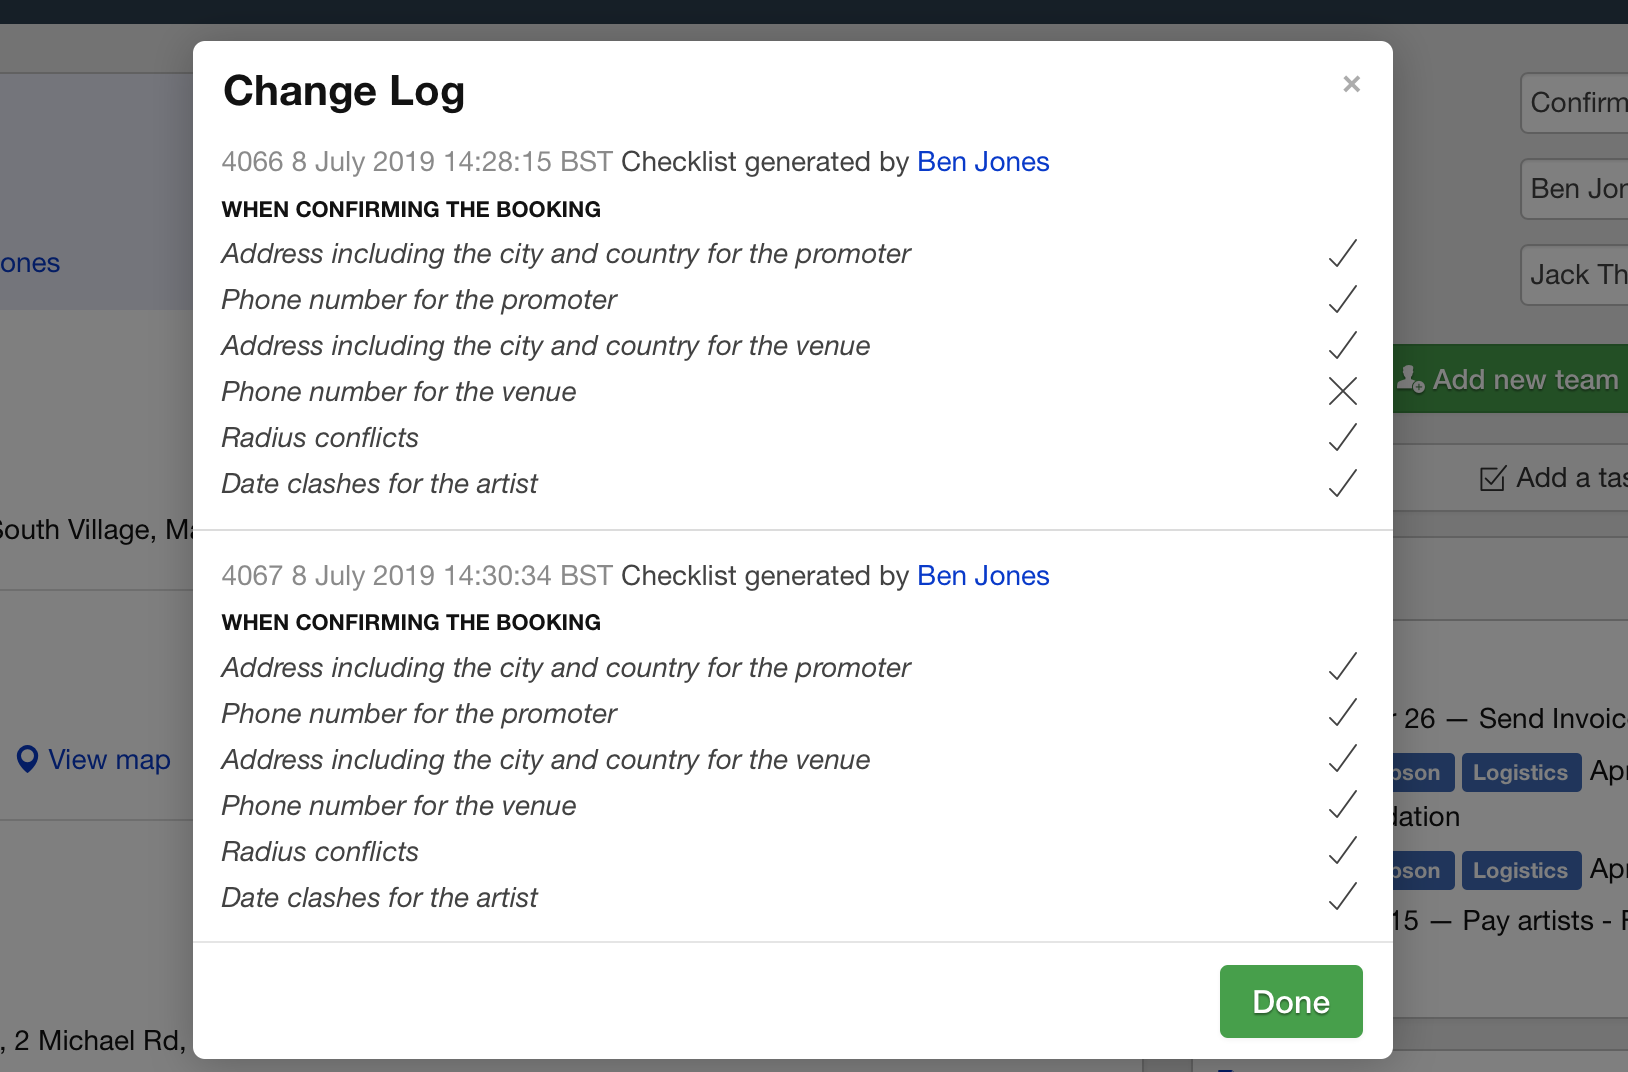
Once all the checks are complete I can change the status to confirmed and all goes well this time. I can then see the history of the checks that took place in the change log. Opening the change log and switching to the checklist tab reveals all of the times the checklist was generated and the results.